Laravel API authentication using passport
Introduction
Laravel Passport provides a full OAuth2 server implementation for your Laravel application in a matter of minutes. Passport is built on top of the League OAuth2 server that is maintained by Andy Millington and Simon Hamp.
Passport Or Sanctum?
Before getting started, you may wish to determine if your application would be better served by Laravel Passport or Laravel sanctum . If your application absolutely needs to support OAuth2, then you should use Laravel Passport.
However, if you are attempting to authenticate a single-page application, mobile application, or issue API tokens, you should use Laravel sanctum. Laravel Sanctum does not support OAuth2; however, it provides a much simpler API authentication development experience.
Installation
Step 1: Install Laravel
If you have an existing Laravel running project, then you can skip this step. Otherwise, we require to get fresh Laravel application using below command, So open your terminal or command prompt and run command below:
composer create-project --prefer-dist laravel/laravel project_name
Step 2: Install Laravel Passport Package
To get started, install Passport via the Composer package manager:
composer require laravel/passport
Step 3: Run Migration
Firstly, setup your database with project through .env file:
          DB_DATABASE=laravel
          DB_USERNAME=root
          DB_PASSWORD=
Passport's service provider registers its own database migration directory, so you should migrate your database after installing the package.The Passport migrations will create the tables your application needs to store OAuth2 clients and access tokens:
php artisan migrate
Step 4: Generate keys
Next, you should execute the
passport:install Artisan command. This command
will create the encryption keys needed to generate secure
access tokens. In addition, the command will create "personal
access" and "password grant" clients which will be used to
generate access tokens:
php artisan passport:install
Step 5: Passport Config
After running the passport:install command, add
the Laravel\Passport\HasApiTokens trait to your
App\Models\User model. This trait will provide a
few helper methods to your model which allow you to inspect
the authenticated user's token and scopes:
          <?php
          namespace App\Models;

          use Illuminate\Database\Eloquent\Factories\HasFactory;
          use Illuminate\Foundation\Auth\User as Authenticatable;
          use Illuminate\Notifications\Notifiable;
          use Laravel\Passport\HasApiTokens;

          class User extends Authenticatable
          {
              use HasApiTokens, HasFactory, Notifiable;
          }
Next, you should call the Passport::routes method
within the boot method of your
App\Providers\AuthServiceProvider. This method
will register the routes necessary to issue access tokens and
revoke access tokens, clients, and personal access tokens:
          <?php
          namespace App\Providers;

          use Illuminate\Foundation\Support\Providers\AuthServiceProvider as ServiceProvider;
          use Illuminate\Support\Facades\Gate;
          use Laravel\Passport\Passport;

          class AuthServiceProvider extends ServiceProvider
          {
            /**
            * The policy mappings for the application.
            *
            * @var array
            */
            protected $policies = [
                'App\Models\Model' => 'App\Policies\ModelPolicy',
            ];

            /**
            * Register any authentication / authorization services.
            *
            * @return void
            */
            public function boot()
            {
                $this->registerPolicies();

                Passport::routes();
            }
          }
Finally, in your application's
config/auth.php configuration file, you should
set the driver option of the
api authentication guard to
passport. This will instruct your application to
use Passport's TokenGuard when authenticating
incoming API requests:
          'guards' => [
              'web' => [
                  'driver' => 'session',
                  'provider' => 'users',
              ],

              'api' => [
                  'driver' => 'passport',
                  'provider' => 'users',
              ],
          ],
Client UUIDs
You may also run the passport:install command with
the --uuids option present. This option will
instruct Passport that you would like to use UUIDs instead of
auto-incrementing integers as the Passport
Client model's primary key values. After running
the passport:install command with the
--uuids option, you will be given additional
instructions regarding disabling Passport's default migrations:
php artisan passport:install --uuids
Deploying Passport
When deploying Passport to your application's servers for the
first time, you will likely need to run the
passport:keys command. This command generates the
encryption keys Passport needs in order to generate access
tokens. The generated keys are not typically kept in source
control:
php artisan passport:keys
If necessary, you may define the path where Passport's keys
should be loaded from. You may use the
Passport::loadKeysFrom method to accomplish this.
Typically, this method should be called from the boot method of
your application's
App\Providers\AuthServiceProvider class:
        /**
        * Register any authentication / authorization services.
        *
        * @return void
        */
        public function boot()
        {
            $this->registerPolicies();

            Passport::routes();

            Passport::loadKeysFrom(__DIR__.'/../secrets/oauth');
        }
Passport Authentication
Below are some authentications sample code to authenticate users via Laravel Passport
Step 1: Create Route
Open api.php from routes folder ,
and replace the code of route with the following:
         <?php

          use Illuminate\Http\Request;
          use Illuminate\Support\Facades\Route;
          use App\Http\Controllers\AuthController;
          /*
          |--------------------------------------------------------------------------
          | API Routes
          |--------------------------------------------------------------------------
          |
          | Here is where you can register API routes for your application. These
          | routes are loaded by the RouteServiceProvider within a group which
          | is assigned the "api" middleware group. Enjoy building your API!
          |
          */

          Route::group([
              'prefix' => 'auth'
          ], function () {
              Route::post('login', [AuthController::class, 'login']);
              Route::post('register', [AuthController::class, 'register']);

              Route::group([
                  'middleware' => 'auth:api'
              ], function () {
                  Route::get('logout', [AuthController::class, 'logout']);
                  Route::get('user', [AuthController::class, 'user']);
              });
          });
Step 2: Create Controller
Create new controller in
Http/Controllers/AuthController.php by the
following command:
php artisan make:controller AuthController
Step 3: Register User API
Open Http/Controllers/AuthController.php and
replace the code with below code:
<?php
namespace App\Http\Controllers;
use Illuminate\Http\Request;
use Illuminate\Support\Facades\Auth;
use Carbon\Carbon;
use App\Models\User;
use Validator;
class AuthController extends Controller
{
/**
* Create user
*
* @param [string] name
* @param [string] email
* @param [string] password
* @param [string] password_confirmation
* @return [string] message
*/
public function register(Request $request)
{
$request->validate([
'name' => 'required|string',
'email' => 'required|string|email|unique:users',
'password' => 'required|string|',
'c_password'=>'required|same:password',
]);
$user = new User([
'name' => $request->name,
'email' => $request->email,
'password' => bcrypt($request->password)
]);
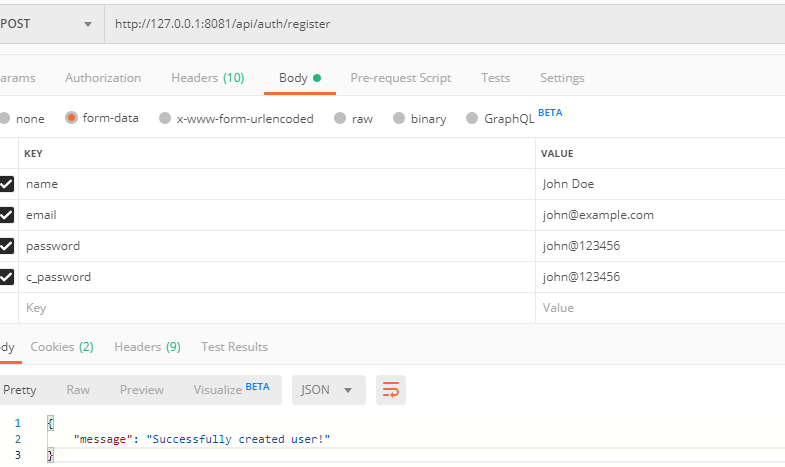
if($user->save()){
return response()->json([
'message' => 'Successfully created user!'
], 201);
}else{
return response()->json(['error'=>'Provide proper details']);
}
}
}
TEST register user API using postman
Step 4: Login User API
In the same file
Http/Controllers/AuthController.php, add below
code after register method:
/**
* Login user and create token
*
* @param [string] email
* @param [string] password
* @param [boolean] remember_me
* @return [string] access_token
* @return [string] token_type
* @return [string] expires_at
*/
public function login(Request $request)
{
$request->validate([
'email' => 'required|string|email',
'password' => 'required|string',
'remember_me' => 'boolean'
]);
$credentials = request(['email', 'password']);
if(!Auth::attempt($credentials))
return response()->json([
'message' => 'Unauthorized'
], 401);
$user = $request->user();
$tokenResult = $user->createToken('Personal Access Token');
$token = $tokenResult->token;
if ($request->remember_me)
$token->expires_at = Carbon::now()->addWeeks(1);
$token->save();
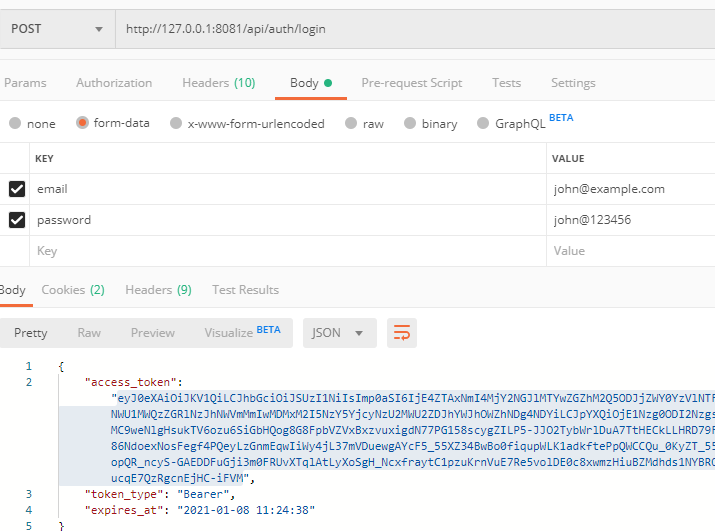
return response()->json([
'access_token' => $tokenResult->accessToken,
'token_type' => 'Bearer',
'expires_at' => Carbon::parse(
$tokenResult->token->expires_at
)->toDateTimeString()
]);
}
TEST Login user API using postman
Step 5: Get User API
In the same file
Http/Controllers/AuthController.php, add below
code after Login method:
/**
* Get the authenticated User
*
* @return [json] user object
*/
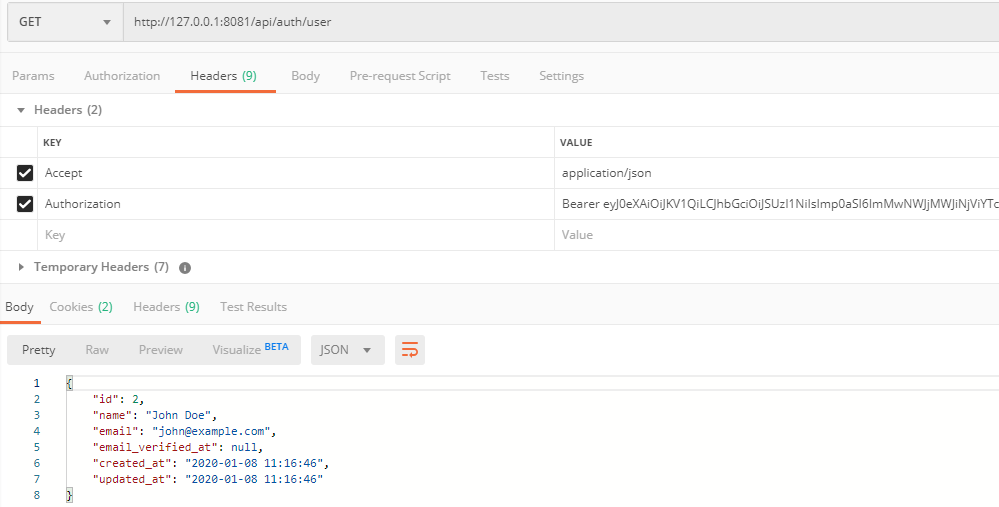
public function user(Request $request)
{
return response()->json($request->user());
}
TEST get user API using postman
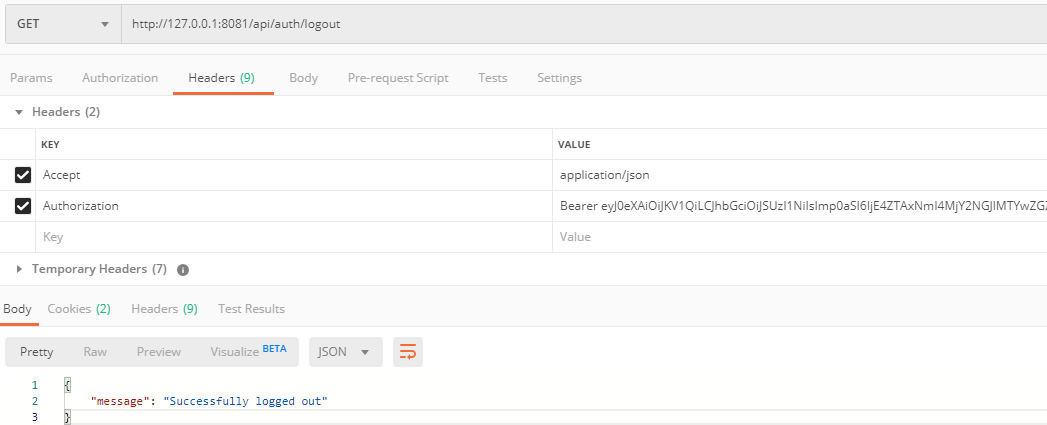
Step 6: Logout User API
In the same file
Http/Controllers/AuthController.php, add below
code after User method:
          /**
          * Logout user (Revoke the token)
          *
          * @return [string] message
          */
          public function logout(Request $request)
          {
            $request->user()->token()->revoke();
            return response()->json([
              'message' => 'Successfully logged out'
            ]);
          }
TEST logout user API using postman