Laravel API Authentication Using Sanctum
Introduction
Laravel Sanctum provides a featherweight authentication system for SPAs (single page applications), mobile applications, and simple, token based APIs. Sanctum allows each user of your application to generate multiple API tokens for their account. These tokens may be granted abilities / scopes which specify which actions the tokens are allowed to perform.
Installation
Step 1: Install Sanctum
You may install Laravel Sanctum via the Composer package manager:
composer require laravel/sanctum
Step 2: Publish the Sanctum configuration and migration
Next, you should publish the Sanctum configuration and migration files using the vendor:publish Artisan command. The sanctum configuration file will be placed in your application's config directory:
php artisan vendor:publish --provider="Laravel\Sanctum\SanctumServiceProvider"
Next, if you plan to utilize Sanctum to authenticate an SPA, you
should add Sanctum's middleware to your
api middleware group within your application's
app/Http/Kernel.php file:
      'api' => [
          \Laravel\Sanctum\Http\Middleware\EnsureFrontendRequestsAreStateful::class,
          'throttle:api',
          \Illuminate\Routing\Middleware\SubstituteBindings::class,
      ],
Step 3: Sanctum Config
Sanctum allows you to issue API tokens / personal access tokens that may be used to authenticate API requests to your application. When making requests using API tokens, the token should be included in the Authorization header as a Bearer token.
To begin issuing tokens for users, your User model
should use the Laravel\Sanctum\HasApiTokens trait:
      use Laravel\Sanctum\HasApiTokens;

      class User extends Authenticatable
      {
          use HasApiTokens, HasFactory, Notifiable;
      }
Finally, you should run your database migrations. Sanctum will create one database table in which to store API tokens:
php artisan migrate
Laravel Sanctum Authentication
Below are some authentications sample code to authenticate users via Laravel Sanctum
Step 1: Create Route
Open api.php from routes folder , and replace the
code of route with the following:
        <?php

          use Illuminate\Http\Request;
          use Illuminate\Support\Facades\Route;
          use App\Http\Controllers\AuthController;
          /*
          |--------------------------------------------------------------------------
          | API Routes
          |--------------------------------------------------------------------------
          |
          | Here is where you can register API routes for your application. These
          | routes are loaded by the RouteServiceProvider within a group which
          | is assigned the "api" middleware group. Enjoy building your API!
          |
          */

          Route::group(['prefix' => 'auth'], function () {
          Route::post('login', [AuthController::class, 'login']);
          Route::post('register', [AuthController::class, 'register']);

          Route::group(['middleware' => 'auth:sanctum'], function() {
            Route::get('logout', [AuthController::class, 'logout']);
            Route::get('user', [AuthController::class, 'user']);
          });
        });
Step 2: Create Controller
Create new controller in Http/Controllers/AuthController.php by the following command:
php artisan make:controller AuthController
Step 3: Register User API
Open Http/Controllers/AuthController.php and
replace the code with below code:
      <php

      namespace App\Http\Controllers;
      use Illuminate\Http\Request;
      use Illuminate\Support\Facades\Auth;
      use App\Models\User;
      use Validator;

      class AuthController extends Controller
      {
      /**
      * Create user
      *
      * @param  [string] name
      * @param  [string] email
      * @param  [string] password
      * @param  [string] password_confirmation
      * @return [string] message
      */
      public function register(Request $request)
      {
          $request->validate([
              'name' => 'required|string',
              'email'=>'required|string|unique:users',
              'password'=>'required|string',
              'c_password' => 'required|same:password'
          ]);

          $user = new User([
              'name'  => $request->name,
              'email' => $request->email,
              'password' => bcrypt($request->password),
          ]);

          if($user->save()){
              $tokenResult = $user->createToken('Personal Access Token');
              $token = $tokenResult->plainTextToken;

              return response()->json([
              'message' => 'Successfully created user!',
              'accessToken'=> $token,
              ],201);
          }
          else{
              return response()->json(['error'=>'Provide proper details']);
          }
        }
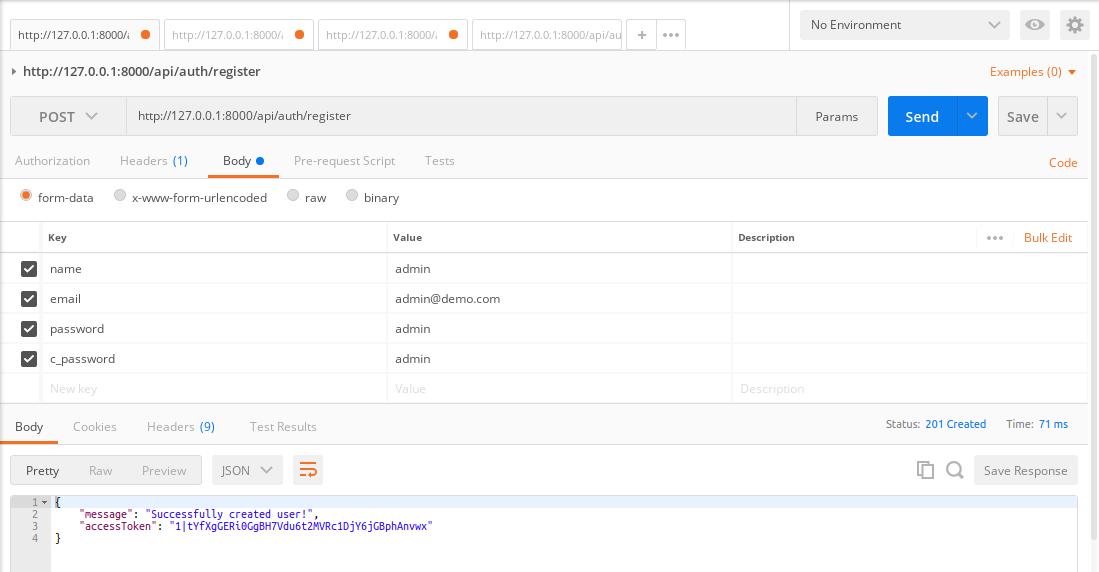
TEST register user API using postman

Step 4: Login User API
In the same file
Http/Controllers/AuthController.php, add below code
after register method:
        /**
        * Login user and create token
        *
        * @param  [string] email
        * @param  [string] password
        * @param  [boolean] remember_me
        */

        public function login(Request $request)
        {
          $request->validate([
          'email' => 'required|string|email',
          'password' => 'required|string',
          'remember_me' => 'boolean'
          ]);

          $credentials = request(['email','password']);
          if(!Auth::attempt($credentials))
          {
          return response()->json([
              'message' => 'Unauthorized'
          ],401);
          }

          $user = $request->user();
          $tokenResult = $user->createToken('Personal Access Token');
          $token = $tokenResult->plainTextToken;

          return response()->json([
          'accessToken' =>$token,
          'token_type' => 'Bearer',
          ]);
        }
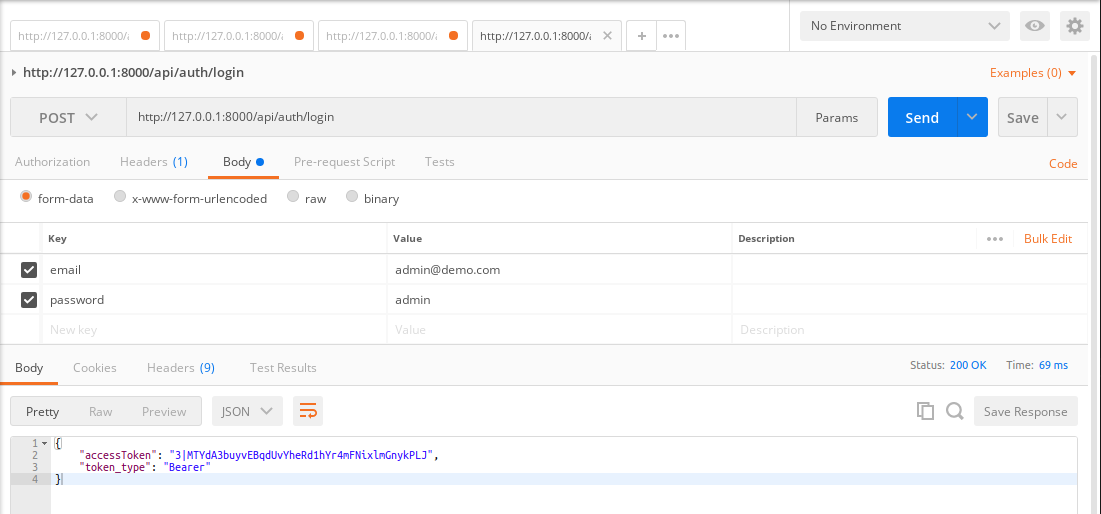
TEST Login user API using postman

Step 5: Get User API
In the same file
Http/Controllers/AuthController.php, add below code
after Login method:
        /**
        * Get the authenticated User
        *
        * @return [json] user object
        */
        public function user(Request $request)
        {
            return response()->json($request->user());
        }
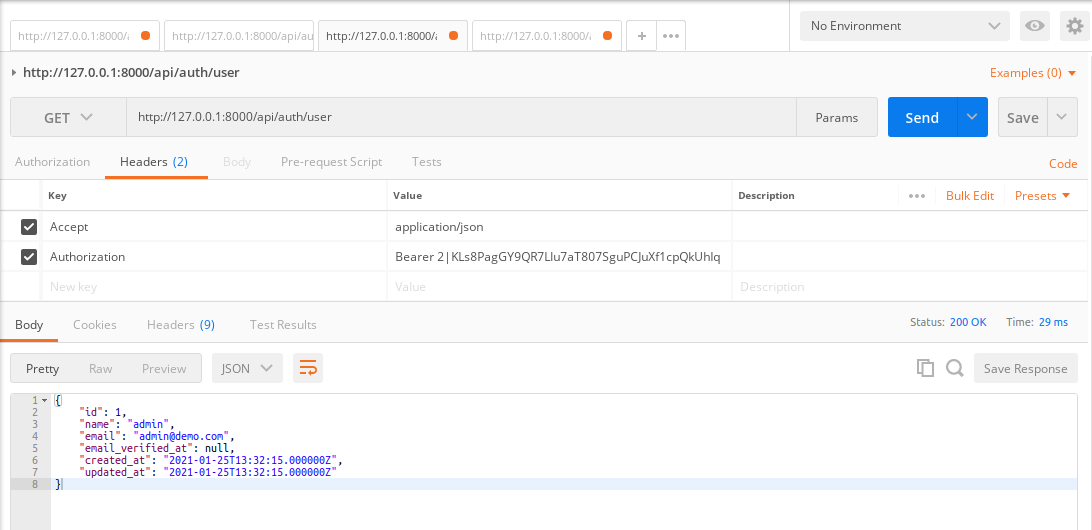
TEST get user API using postman

Step 6: Logout User API
In the same file
Http/Controllers/AuthController.php, add below code
after User method:
      /**
      * Logout user (Revoke the token)
      *
      * @return [string] message
      */
      public function logout(Request $request)
      {
          $request->user()->tokens()->delete();

          return response()->json([
          'message' => 'Successfully logged out'
          ]);

      }
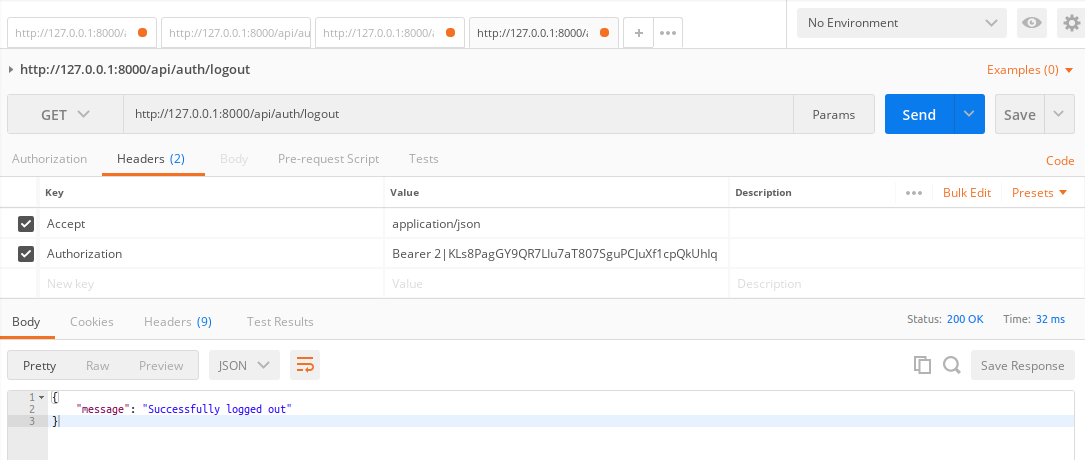
TEST get user API using postman
