Laravel API authentication using passport
Laravel Passport provides a full OAuth2 server implementation for your Laravel application in a matter of minutes.
Introduction
Laravel Passport provides a full OAuth2 server implementation for your Laravel application in a matter of minutes. Passport is built on top of the League OAuth2 server that is maintained by Andy Millington and Simon Hamp.
Passport Or Sanctum?
Before getting started, you may wish to determine if your application would be better served by Laravel Passport or Laravel Sanctum. If your application absolutely needs to support OAuth2, then you should use Laravel Passport.
However, if you are attempting to authenticate a single-page application, mobile application, or issue API tokens, you should use Laravel Sanctum. Laravel Sanctum does not support OAuth2; however, it provides a much simpler API authentication development experience.
API() features.Installation
- To use
laravel/passport, your system requires theext-sodiumextension installed. Ensure this extension is enabled by checking yourphp.inifile: - You may install Laravel Passport via the
install:apiArtisan command: - After running the
install:apicommand, add theLaravel\Passport\HasApiTokenstrait to yourApp\Models\Usermodel. This trait will provide a few helper methods to your model that allow you to inspect the authenticated user's token and scopes: install:apicommand will addroutes/api.phpfile. That should be included in thebootstrap/app.phpfile inside withRouting as below- Finally, in your application's
config/auth.phpconfiguration file, you shouldAPIauthentication guard and set thedriveroption topassport. This will instruct your application to use Passport'sTokenGuardwhen authenticating incoming API requests: - Finally, you should run your database migrations. Passport will create one database table in which to store API tokens:
extension=sodiumphp artisan install:api --passportThis command will publish and run the database migrations necessary for creating the tables your application needs to store OAuth2 clients and access tokens. The command will also create the encryption keys required to generate secure access tokens.
<?php

namespace App\Models;

use Illuminate\Database\Eloquent\Factories\HasFactory;
use Illuminate\Foundation\Auth\User as Authenticatable;
use Illuminate\Notifications\Notifiable;
use Laravel\Passport\HasApiTokens;

class User extends Authenticatable
{
    use HasApiTokens, HasFactory, Notifiable;
}return Application::configure(basePath: dirname(__DIR__))
->withRouting(
web: __DIR__ . '/../routes/web.php',
api: __DIR__ . '/../routes/api.php',
commands: __DIR__ . '/../routes/console.php',
health: '/up',
)
->withMiddleware(function (Middleware $middleware) {
// Apply web middleware
$middleware->web(LocaleMiddleware::class);
// Apply session and API middleware for Passport
$middleware->api([
\Illuminate\Session\Middleware\StartSession::class, // Session management
\Laravel\Passport\Http\Middleware\CreateFreshApiToken::class, // Passport token creation
]);
})
->withExceptions(function (Exceptions $exceptions) {
//
})
->create();'guards' => [
'web' => [
'driver' => 'session',
'provider' => 'users',
],
'api' => [
'driver' => 'passport',
'provider' => 'users',
],
],php artisan migrateDeploying Passport
When deploying Passport to your application's servers for the first time, you will likely need to run the
passport:keys command. This command generates the encryption keys Passport needs in order to generate access tokens. The generated keys are not typically kept in source control:
php artisan passport:keys
If necessary, you may define the path where Passport's keys should be loaded from. You may use the
Passport::loadKeysFrom method to accomplish this. Typically, this method should be called from the boot method of your application's App\Providers\AppServiceProvider class:
/**
* Bootstrap any application services.
*/
public function boot(): void
{
    Passport::loadKeysFrom(__DIR__.'/../secrets/oauth');
}
Passport Authentication
We'll create simple user authentication methods via Laravel passport below.
- Create Route: Create routes into
routes/api.phpthat point toAuthController: - Create Controller: Now, we have to create a controller that handles all API requests. Follow below artisan command to create a new controller:
- Register User: We'll implement a simple method to register a user:
- Login User:
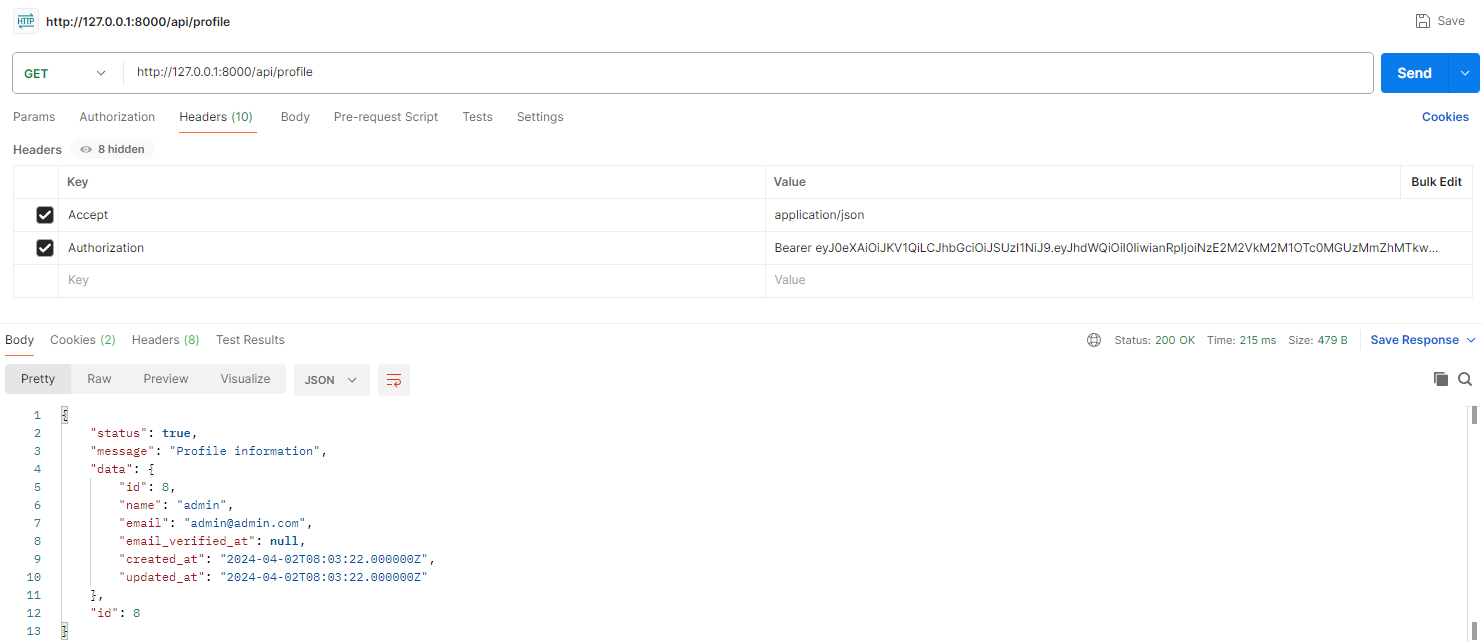
- User Profile: In the same file AuthController.php, create a simple method to get the user's details:
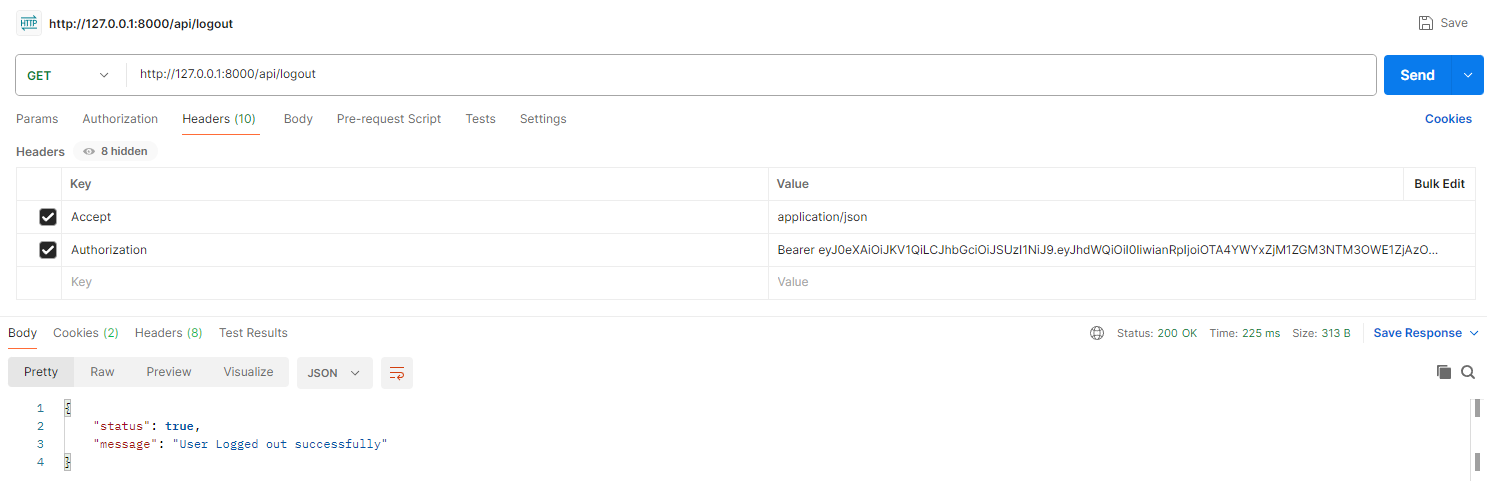
- Logout User: In the same file
AuthController.php, create a simple method torevokethe token from the user:
<?php

use Illuminate\Http\Request;
use Illuminate\Support\Facades\Route;
use App\Http\Controllers\AuthController;

// Open Routes
Route::post('/register', [AuthController::class, 'register']);
Route::post('/login', [AuthController::class, 'login']);

// Protected Routes
Route::group(['middleware' => 'auth:api'], function () {
  Route::get('/profile', [AuthController::class, 'profile']);
  Route::get('/logout', [AuthController::class, 'logout']);
});php artisan make:controller AuthController<?php
namespace App\Http\Controllers;
use App\Http\Controllers\Controller;
use Illuminate\Http\Request;
use App\Models\User;
class AuthController extends Controller
{
// POST [ name, email, password ]
public function register(Request $request)
{
$request->validate([
'name' => 'required|string',
'email' => 'required|string|email|unique:users',
'password' => 'required|string|confirmed',
'password_confirmation'=>'required|same:password',
]);
$user = User::create([
'name' => $request->name,
'email' => $request->email,
'password' => bcrypt($request->password)
]);
return response()->json([
'status' => true, // 'error
'message' => 'User created successfully',
'data' => []
]);
}
}TEST register user API using postman
Accept: application/json in postman.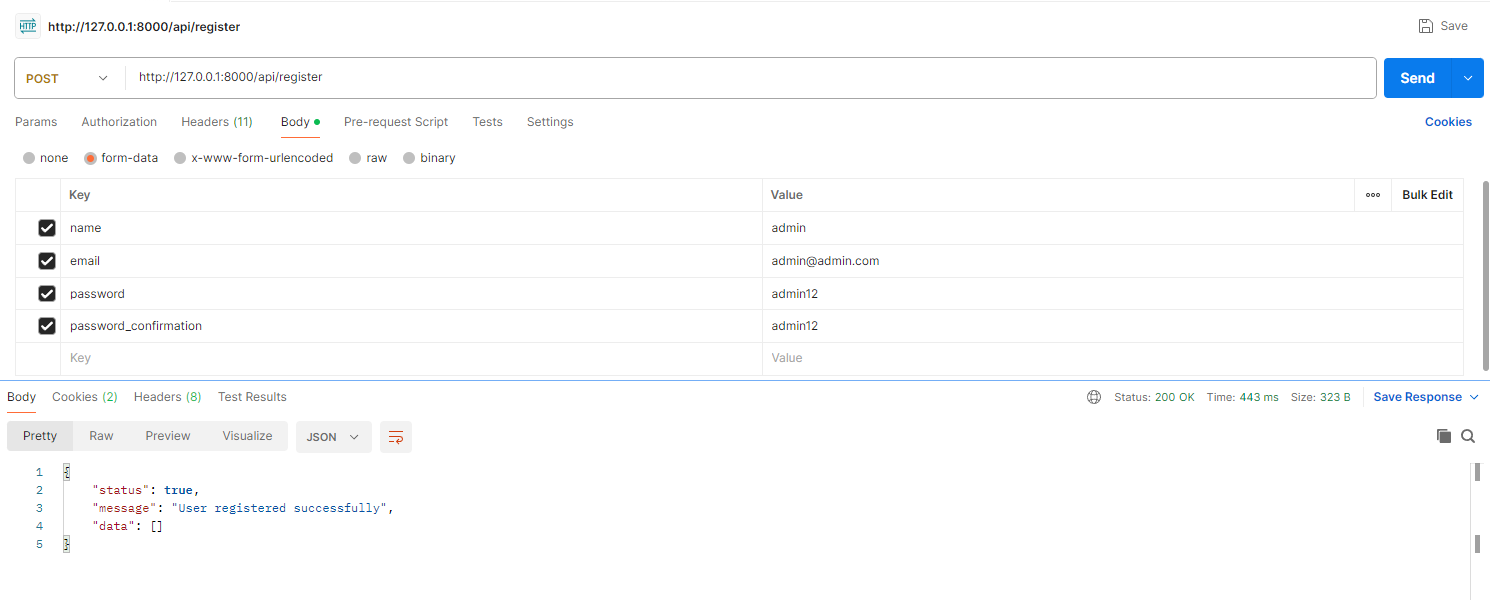
Creating a Personal Access Client: Before your application can issue personal access tokens, you will need to create a personal access client.
php artisan passport:client --personalIn the file AuthController.php, create a simple login method that generates API token via passport:
<?php

namespace App\Http\Controllers;

use App\Http\Controllers\Controller;
use Illuminate\Http\Request;
use App\Models\User;
use Illuminate\Support\Facades\Hash;
public function login(Request $request)
{
  $request->validate([
    'email' => 'required|string|email',
    'password' => 'required|string'
  ]);

  // User object
  $user = User::where("email", $request->email)->first();

  if(!empty($user)){
    // User exists
    if(Hash::check($request->password, $user->password)){
      // Password matched
      $token = $user->createToken("myAccessToken")->accessToken;

      return response()->json([
        "status" => true,
        "message" => "Login successful",
        "token" => $token,
        "data" => []
      ]);
    }else{
      return response()->json([
        "status" => false,
        "message" => "Password didn't match",
        "data" => []
      ]);
    }
  }else{
    return response()->json([
      "status" => false,
      "message" => "Invalid Email value",
      "data" => []
    ]);
  }
}
TEST Login user API using postman
Accept: application/json in postman.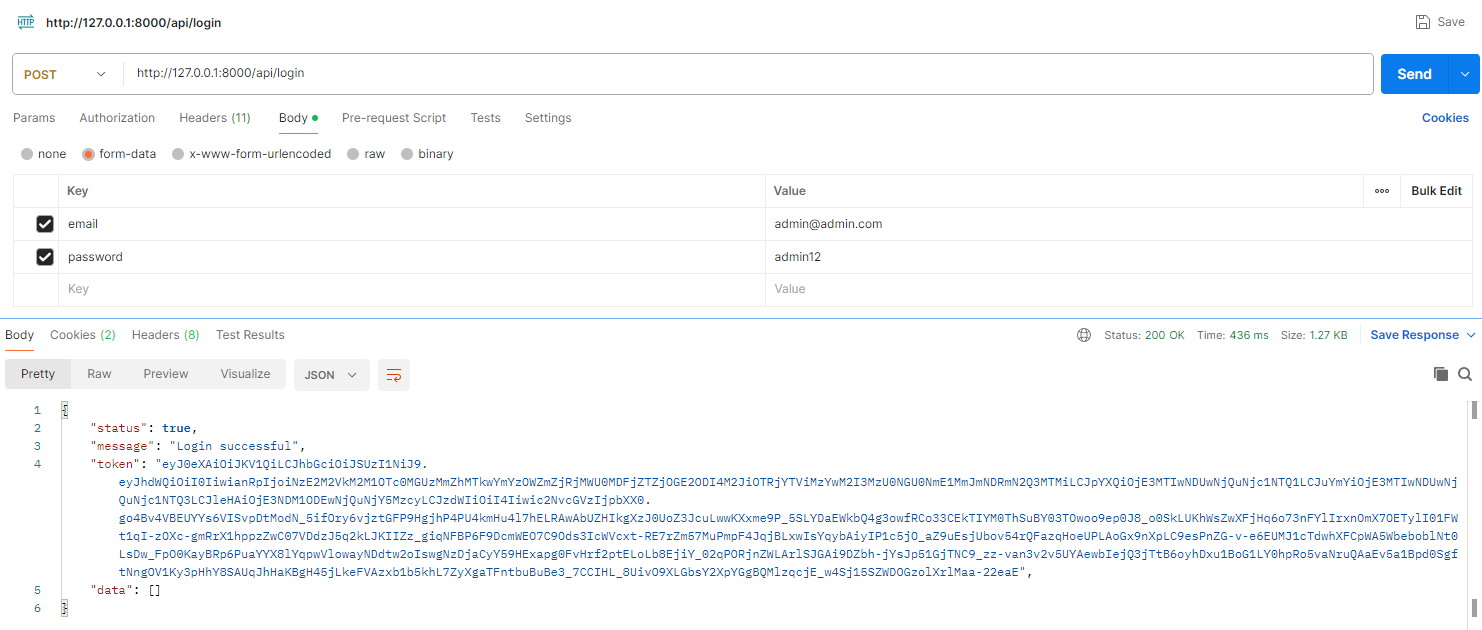
public function profile(){
  $userData = auth()->user();

  return response()->json([
    "status" => true,
    "message" => "Profile information",
    "data" => $userData,
    "id" => auth()->user()->id
  ]);
}
TEST get profile API using postman
public function logout(){

  $token = auth()->user()->token();
  $token->revoke();

  return response()->json([
    "status" => true,
    "message" => "User Logged out successfully"
  ]);
}
TEST logout user API using postman