Django Admin - Database
To integrate with different database OR New SQLite database:
Integrate Manually:
-
Django provides default setting for SQLite3. If you decide to use a different database, please refer to this documentation for configuration details.
DATABASES = { "default": { "ENGINE": "django.db.backends.sqlite3", "NAME": BASE_DIR / "db.sqlite3", } } -
To make migration of the database, run the following command in the terminal:
python manage.py migrate -
To access the Django admin panel, you need to create a superuser account. If you want to know how to create a super user, refer to this Documentation.
python manage.py createsuperuser -
When the server starts, you can access the Django admin panel by simply adding '/admin' to the base URL, resulting in
http://127.0.0.1:8000/admin. -
Once you are Logged in navigate to "GROUP" section, and create 2 groups.
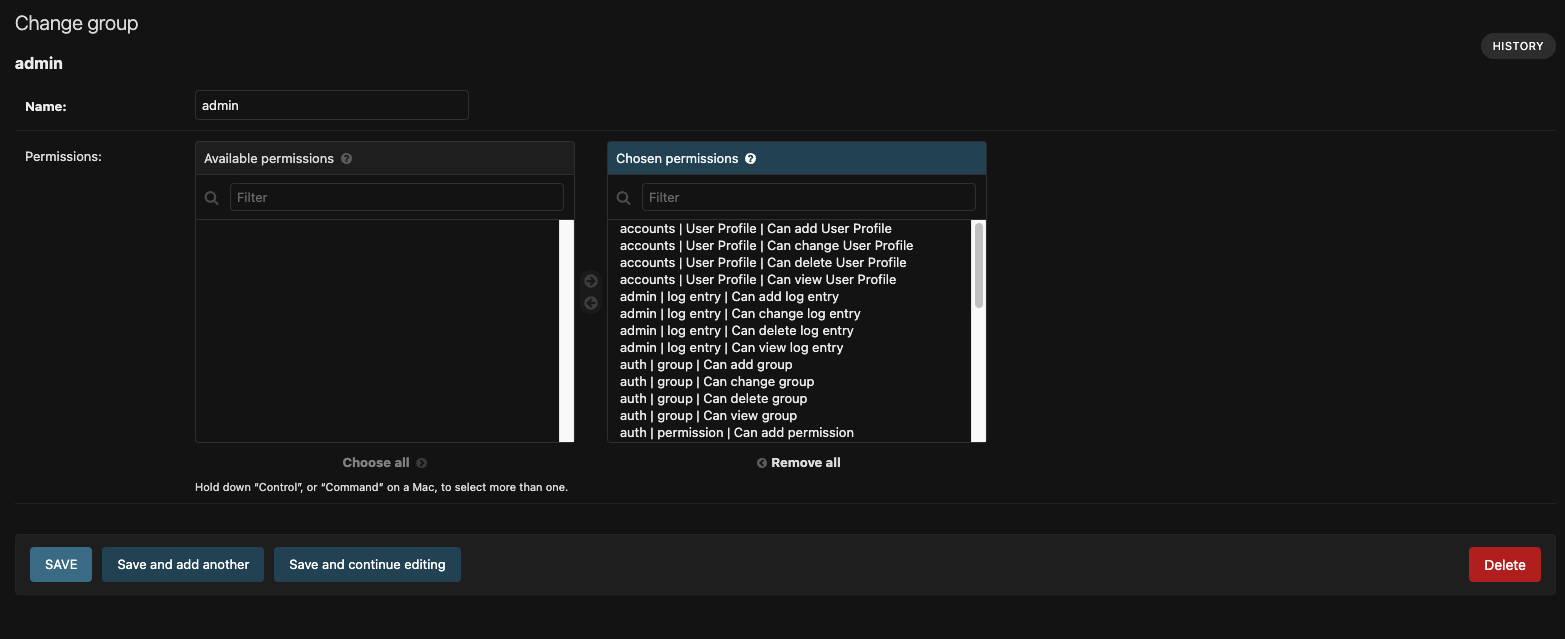
- Group
adminwith all permission. -
Group
clientwith only Transaction view permission.Note: This permission is specific to the Transaction app, playing a crucial role in displaying the Transaction app for new clients. You also have the flexibility to create and assign custom permissions to the 'client' group as needed.
Tip: If you want to learn how to use permission in Vuexy, please refer to the Authentication.
For more detailed information on permissions, please refer to the official Django documentation.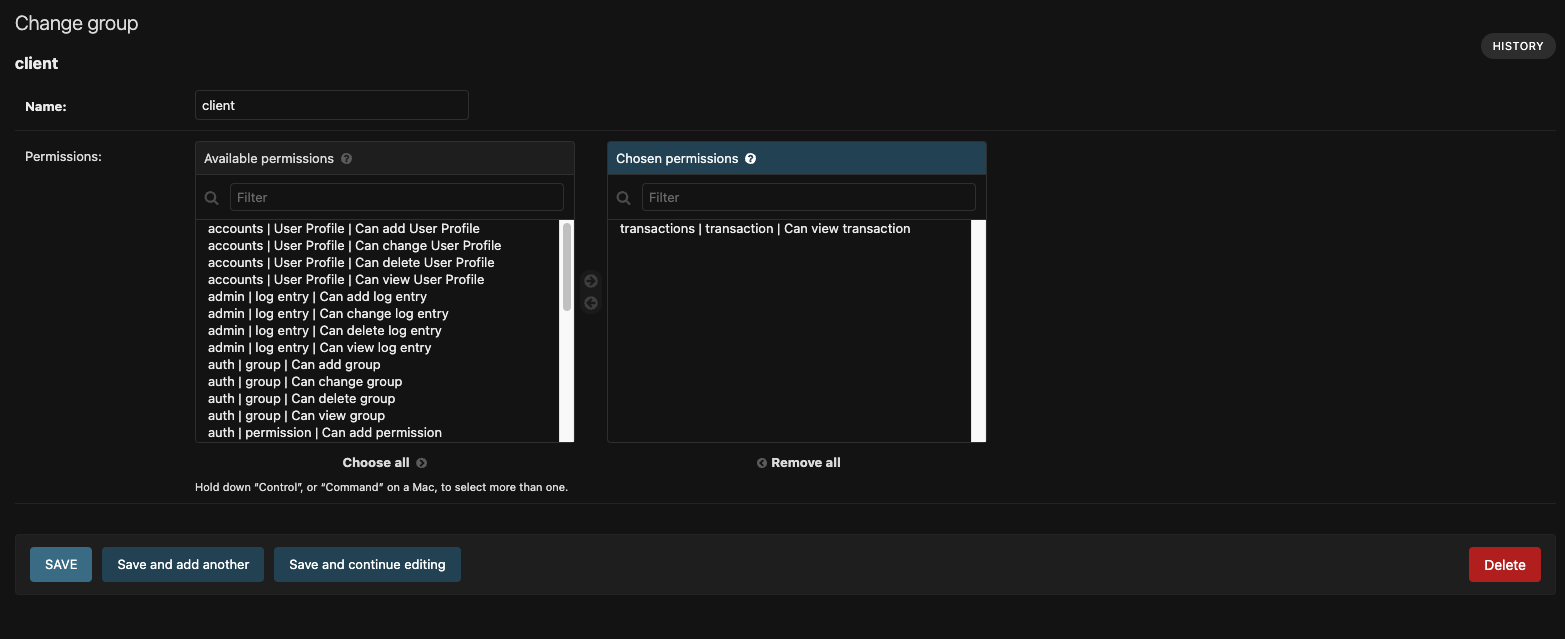
- Group
-
After creating the group mentioned earlier, navigate to the
Userssection in the admin panel, and assign theadmingroup to the superuser.Info : When a user is created through the authentication process, they will be automatically assigned to theclientgroup. - To seed the database with fake transactions for the
CRUDapp, run the following command.
python manage.py loaddata transactions-list.jsonIf you prefer not to use seed data, you can remove the 'fixtures' folder from the 'transactions' app.
Integrate with datadump.json:
Follow the instructions outlined in steps 1 to 2 under the Integrate Manually section. Subsequently, execute the provided command to import data into a different database or a new SQLite database.
python manage.py loaddata datadump.jsonNOTE: Vuexy already provides datadump.json file under full-version/datadump.json. Though if you want to export your data, use command python3 manage.py dumpdata > datadump.json to Dump data from SQLite.
Integrate with PostgresSQL:
Migrating a Django application from SQLite to PostgreSQL involves a few steps. Here's a general guide to help you with the process:
- Install PostgreSQL: Make sure PostgreSQL is installed on your machine or server. You can install it using a package manager like Homebrew on macOS or apt on Ubuntu. Alternatively, you can download and install it from the official PostgreSQL website.
-
Install
psycopg2: Update your Django project's requirements to include thepsycopg2package, which is a PostgreSQL adapter for Python. Install it using:pip install psycopg2 -
Update DATABASES Settings: Update your Django project's
config/settings.pyfile to use PostgreSQL. Modify the DATABASES setting:DATABASES = { 'default': { 'ENGINE': 'django.db.backends.postgresql', 'NAME': 'your_db_name', 'USER': 'your_db_user', 'PASSWORD': 'your_db_password', 'HOST': 'localhost', 'PORT': '5432', } }Replace
your_db_name,your_db_user, andyour_db_passwordwith your PostgreSQL database name, user, and password. -
Run the following Django management commands to create the PostgreSQL database schema and migrate data:
python manage.py migrate -
Execute the provided command to import data into a different database or a new SQLite database.
Heds up!: This approach is recommended only when working with a completely new database. If you attempt to load the datadump.json file into an existing database, it may overwrite your current data.
python manage.py loaddata datadump.jsonNOTE: Vuexy already provides
datadump.jsonfile underfull-version/datadump.json.